

Unleash the Perfect Edge: A Comprehensive Guide to Japanese Knife Sharpening Stones
Introduction to Japanese Knife Sharpening Stones
Sharpening stones are one of those tools that are essential for keeping your knives in tip-top shape. I've been using stones for years now, and I've learned a lot about the different types and how to use them effectively.
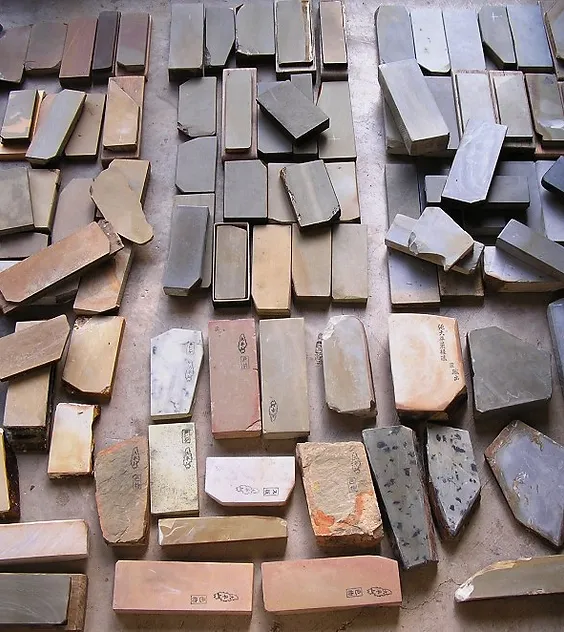
In my experience, Japanese stones are some of the best on the market. They come in a variety of types, each with their own advantages and disadvantages. From natural stones to water stones, there's a sharpening stone out there for everyone.
One of my favorite things about using a sharpening stone is that it's a satisfying process. I love feeling the blade getting sharper with each pass over the stone. It's a great way to take a break from the "daily grind" (pun slightly intended) and focus on a task that requires precision and patience.
Benefits of Using a Japanese Knife Sharpening Stone
A sharpening stone can be a great way to take a break from your usual work day and focus on something that requires patience and care. Additionally, I find the process of using these stones incredibly satisfying - you can feel the blade getting sharper with each pass!
And let's not forget about the end result. When you're done with a sharpening session, you'll have a knife that's razor-sharp and ready to tackle any kitchen task with ease. It's amazing to see the transformation from a dull, worn-out blade to a shining, sharp one.
Overall, using a Japanese knife sharpening stone is a great investment in your kitchen gear. It's a simple, yet effective way to keep your knives in top condition for years to come.
Overview Of The Six Main Types Of Japanese Knife Sharpening Stones
In this section, we're going to dive into the six main types of Japanese Knife Sharpening Stones. This can be a bit overwhelming, so I'll break it down for you.
-
Natural Stone:
These stones are just what they sound like, natural stones that have been mined and then shaped into flat stones you can use for sharpening chef knives.
-
Ceramic Stone:
These stones are made from ceramic material and can be a great option if you're looking for a budget-friendly alternative to natural stones.
-
Diamond Stone:
If you're looking for something that's going to last a long time and can handle even the toughest blades, a diamond stone might be right up your alley.

-
Combination Stone:
If you're looking for a one-stop-shop, a combination stone might be your best bet. These stones usually have two sides, one with a finer grit and one with a coarser grit.
-
Water Stone:
Water stones are perfect for those who like to work with water. They're softer than other sharpening stones which makes them great for creating a fine edge quickly.
-
Oil Stone:
These stones are usually made from Novaculite or Aluminum Oxide and are lubricated with oil. They're a bit more traditional and can be a great option for those who prefer oil to water.
There you have it, a quick rundown of each main sharpening stone for Japanese Knives . Keep in mind that each category is not necessarily a separate type. You can have a water stone that is a combination stone for example.
If you're a beginner, I would suggest either a combination water stone, or diamond stone. In my experience a diamond stones are the easiest since it works quickly and doesn't need to be flattened, but a water stone is also very accessible, a little more authentic, and has often given me a sharper knife.
Whether you're a pro or a beginner, there's a sharpening stone out there for you!
Importance of Knife Sharpening Stones
Sharpening stones are an essential tool for keeping your sharp knives in tip-top shape. You know how frustrating it is when you're trying to chop vegetables or fillet a fish, and your knife just can't seem to cut through with ease.
That's where sharpening stones come in - they help to restore the edge on your blades and make cutting a breeze. Whether you're a professional chef or a home cook, having a set of high-quality sharpening stones on hand is a must to keep your knife edge razor sharp.
Not only do they help to maintain the sharpness of your knives, but they also extend their lifespan. Dull knives will obviously not cut as well and for anyone who has tried using a great knife, you know how much better a razor sharp edge is.
So, if you want to get the most out of your chef knife and make cooking a smoother and more enjoyable experience, investing in a good set of sharpening stones is definitely worth it!
Advantages and Disadvantages of the Six Main Types of Japanese Knife Sharpening Stones
Alright folks, now that we've got a general idea of what knife sharpening stones are and why they're important, let's dive into the pros and cons of each of the six main types of Japanese knife sharpening stones.
Natural Stone:
Advantages: This one's made from straight-up rocks! So, if you're into using natural products, this one's for you.
Disadvantages: But, be prepared for the fact that it might wear down faster than other types of sharpening stones and could be on the pricier side.
Ceramic Stone:
Advantages: This type of sharpening stone is a bit more durable than natural stones and can be found at a more affordable price point.
Disadvantages: However, you'll need to have a bit more skill to use this one as it's harder and not as forgiving as some of the other types.
Diamond Stone:
Advantages: If you're looking for a sharpening stone that's going to last you a long time, this one's it. Diamonds are forever!
Disadvantages: But, be prepared for the cost. This type of sharpening stone is often the most expensive for a really good one.
Combination Stone:
Advantages: This one's like the best of both worlds. You get the durability of a ceramic stone and the quick results of a natural stone. With both a coarse grit and fine grit, these are kind of an all-in-one stone.
Disadvantages: But, be prepared to pay a bit more for the combination of having a coarse side and a fine side
Water Stone:
Advantages: This one's a popular choice for kitchen knife enthusiasts. It's softer than other whetstones, which allows it to quickly create a sharp cutting edge. It can also repair, sharpen, and polish dull blades.
Disadvantages: But, you'll need to soak it in water before use and make sure to clean and dry it thoroughly after.
Oil Stone:
Advantages: This one's great for those who like to keep things simple. It's easy to use and maintain.
Disadvantages: However, you'll need to make sure you have oil on hand as it's essential for using this type of sharpening stone.
So there you have it, the pros and cons of each type of Japanese knife sharpening stone. Choose the one that fits your needs, skill level, and budget best."
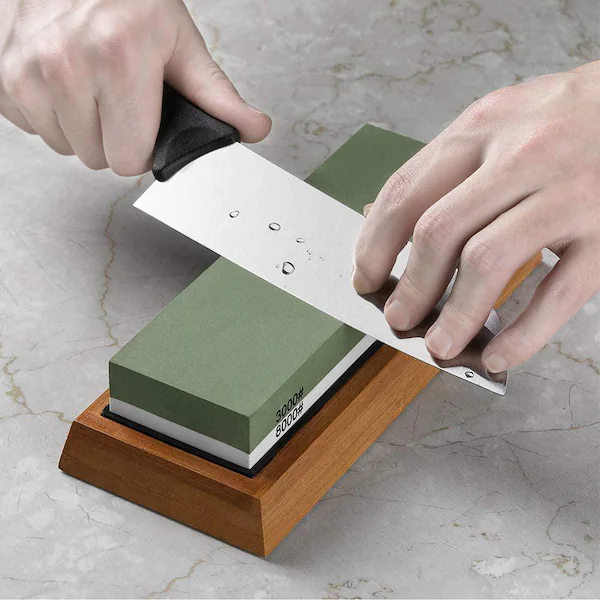
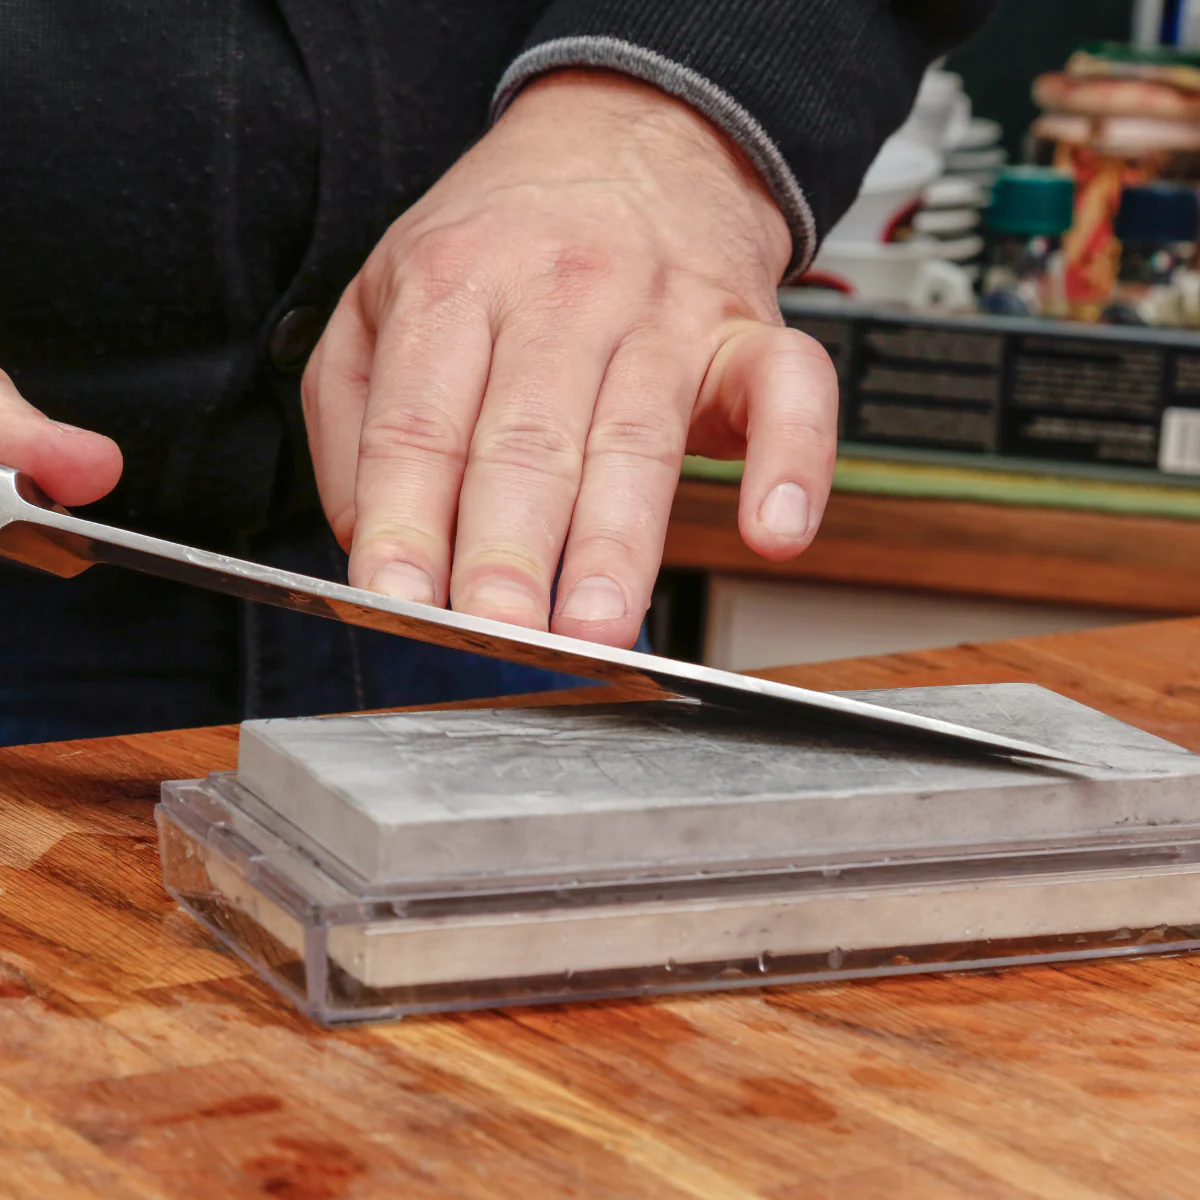
How To Use A Japanese Whetstone
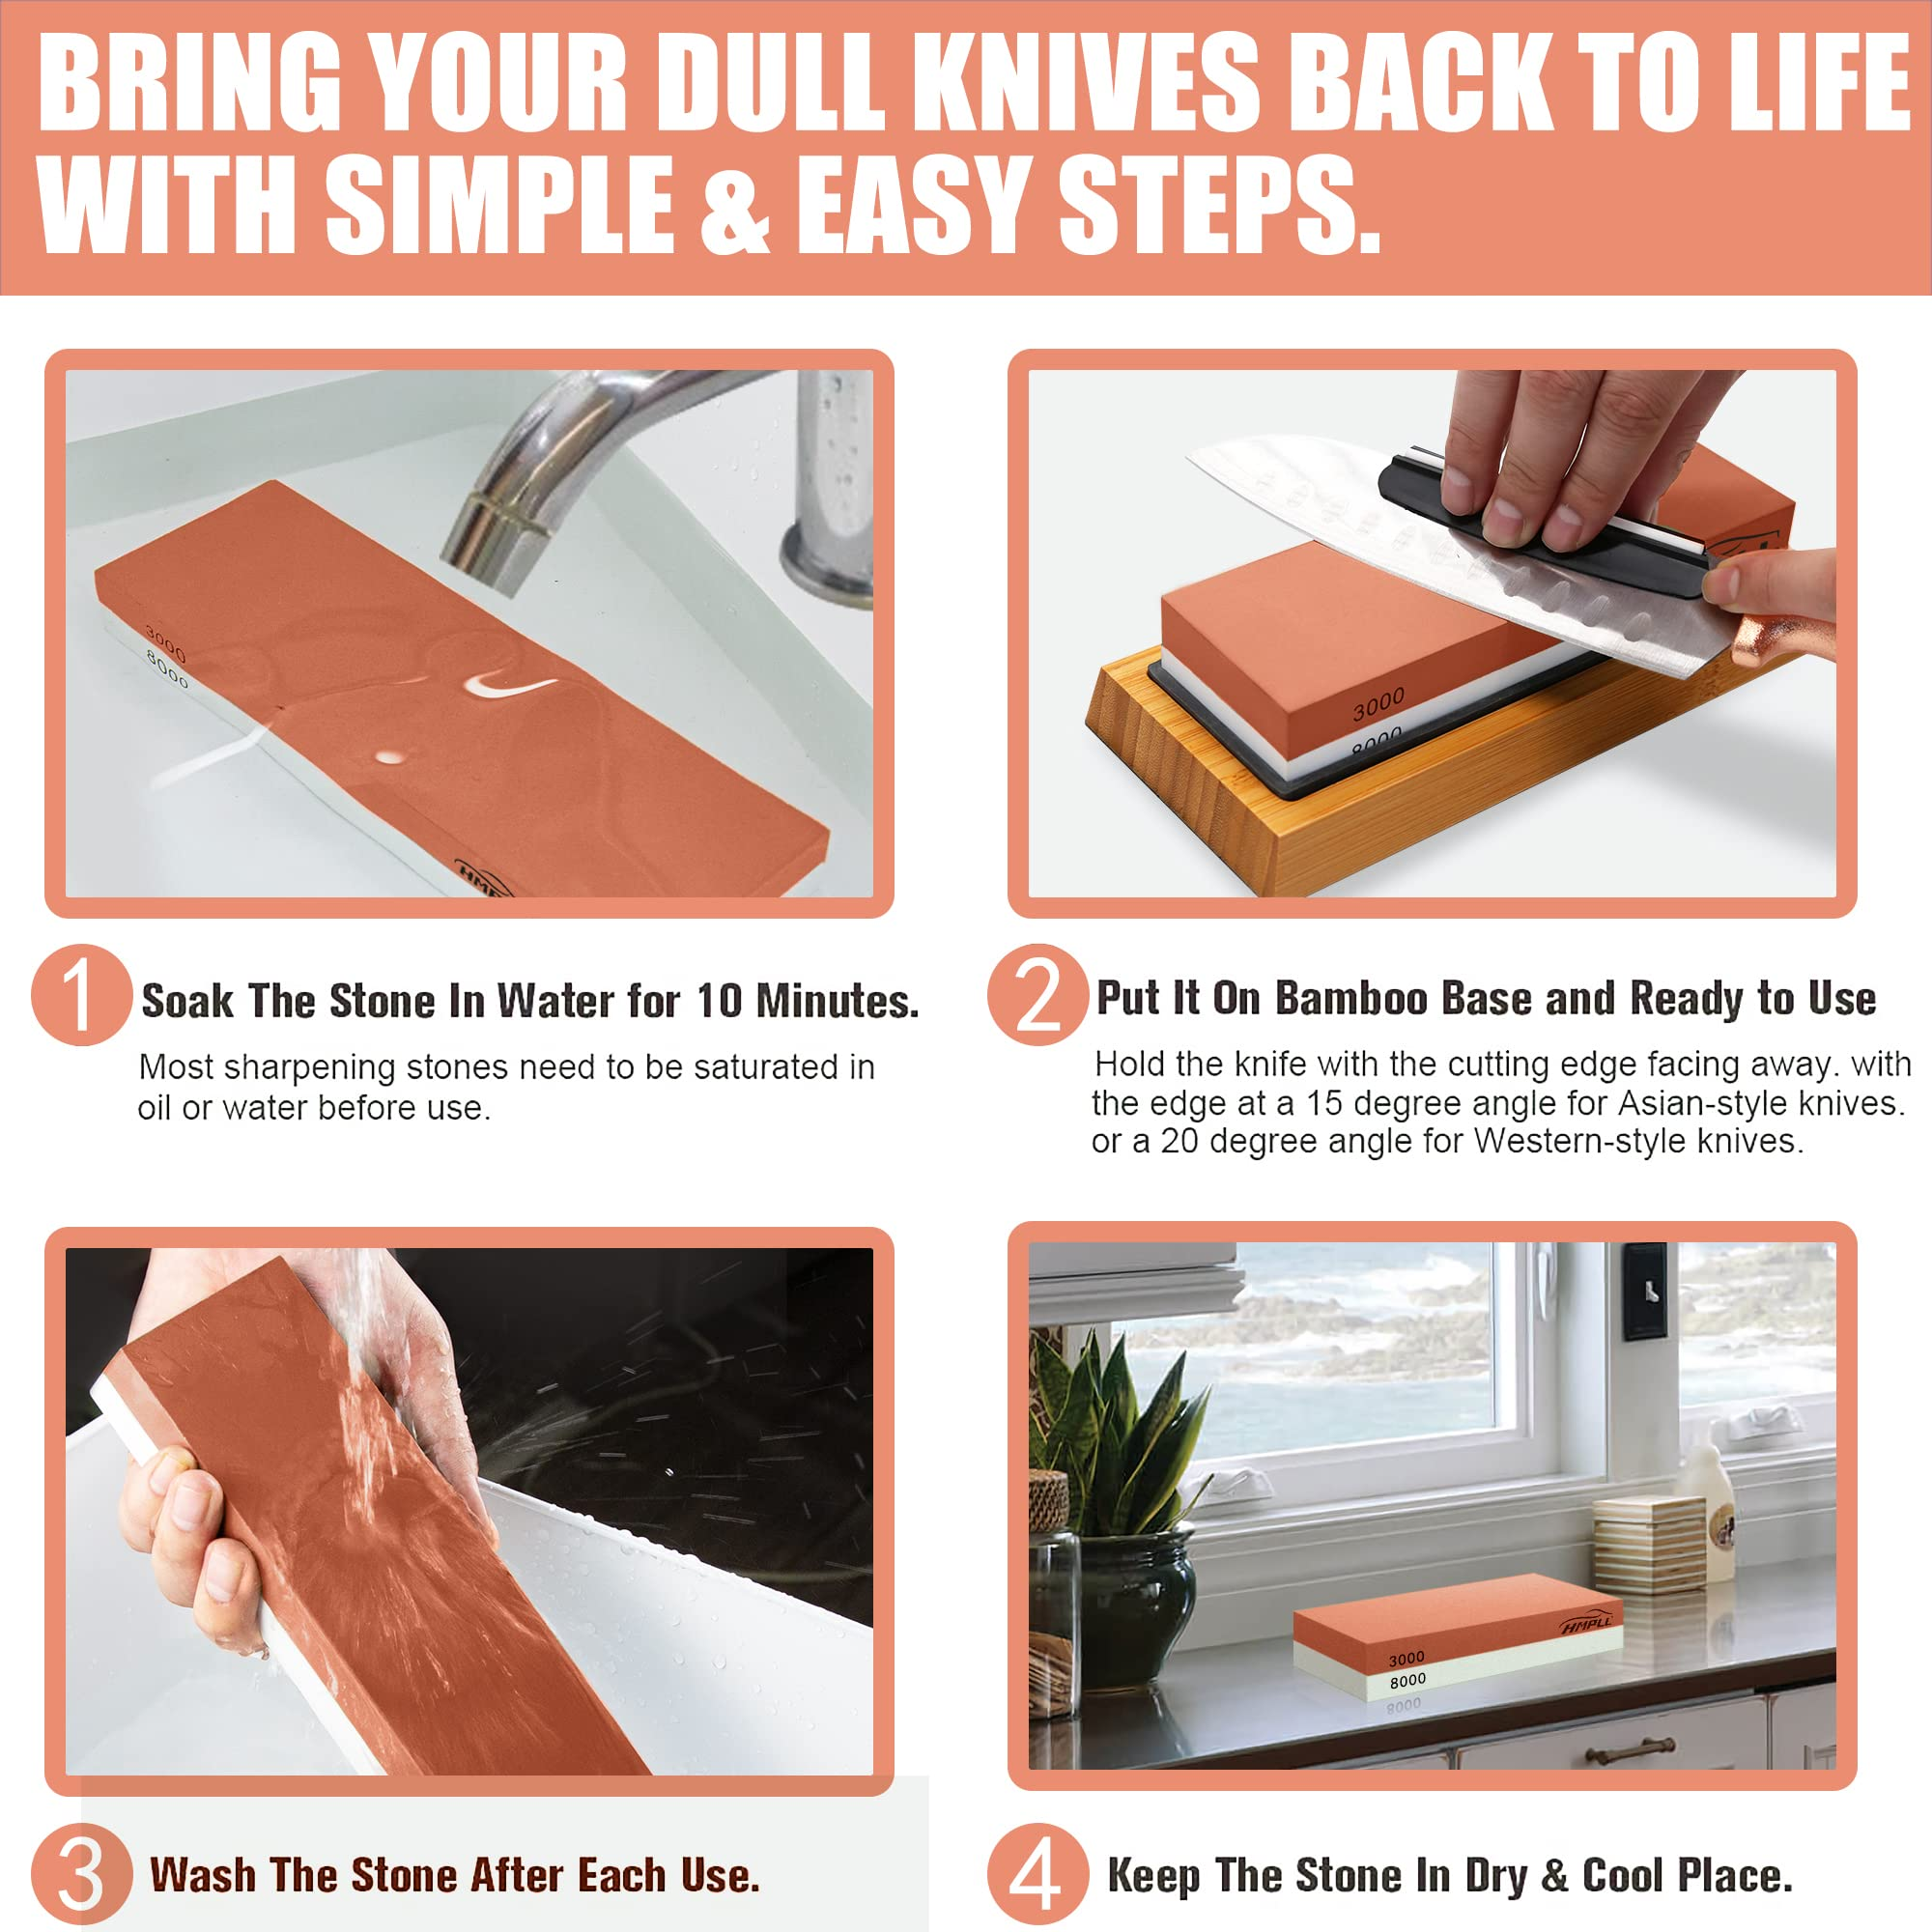
When it comes to using Japanese water stones, the first step is all about preparation. You need to make sure your whetstone is ready to go before you start using it to sharpen your knife blade. And how do you do that? Simple, just soak it in water!
Now, I know you're probably thinking "that's it?" but trust me, there's a bit more to it. You need to fully submerge the stone in water until the bubbles stop coming out. This might take a while - anywhere from 10 minutes to an hour or so - so be patient, grab a cup of coffee or something and take a seat. It's important to let the water stone soak long enough so that all the air pockets are filled. Only then will it be ready for use.
Also keep in mind that there are different grit sizes and if you are planning to fully sharpen your favorite knife, you will need to soak each stone.
Stay tuned for the next step - using your whetstone!
Sharpening process
-
Determine the coarseness of the stone
a. Use a lower grit stone to remove chips or nicks in the blade
b. Use a higher grit stone to refine the edge of the knife
-
Place the stone on a flat surface
a. Ensure stability of the stone while sharpening
-
Hold the knife at the proper angle
a. Usually around 10 to 20 degrees for a single-bevel knife and around 15 to 25 degrees for a double-bevel knife
-
Move the knife back and forth along the stone
a. Move evenly along the entire length of the blade
b. Make sure to maintain the angle and pressure
-
Check the blade edge
a. Use your fingers or a magnifying glass to check for burrs or deformities in the blade
-
Repeat as needed
a. Repeat steps 4 and 5 until the desired sharpness is achieved
b. Use progressively higher grit stones to refine the edge
Maintenance of the stone
Clean the stone after each use
a. Rinse with water and dry thoroughly
Store the stone properly
a. Store in a dry place to prevent the stone from cracking or deteriorating.
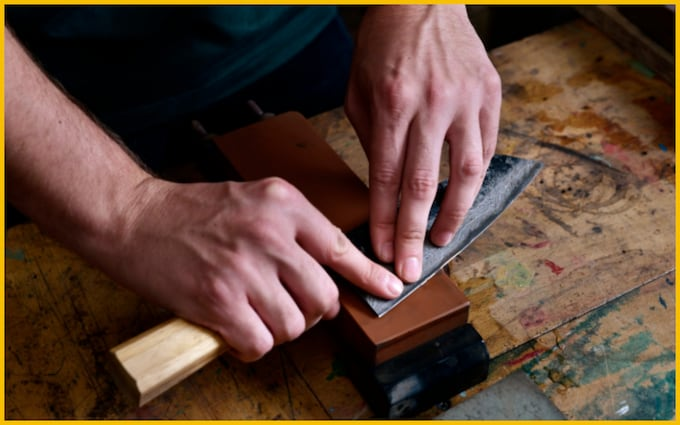
Polishing the Edge
Polishing the edge of a knife is the final step in achieving a razor-sharp blade. A polished edge not only looks sleek and professional, but it also helps to maintain the sharpness of the blade for a longer period of time. Here's how you can do it:
-
Choose the right stone: When it comes to polishing the edge of a knife, you'll want to use a finer grit stone, such as a 4,000 grit water stone or a leather strop.
-
Apply light pressure: Using light pressure, glide the knife along the surface of the stone or strop at a low angle, keeping the blade flat and level. Repeat this motion several times on each side of the blade.
-
Repeat on the other side: Repeat the process on the other side of the blade, making sure to maintain an even pressure and angle.
-
Check your work: After several passes on each side of the blade, you should have a polished edge that is reflective and smooth to the touch. Check your work by slicing through a piece of paper or running your finger along the edge.
Remember, when it comes to polishing the edge of a knife, slow and steady wins the race. It's better to use light pressure and make multiple passes than to apply too much pressure and risk damaging the blade.
The Varying Grit Sizes of a Sharpening Stone
Sharpening stones come in a range of grits, which refers to the size of the abrasive particles on the stone. The grit of a sharpening stone determines the coarseness or fineness of the abrasive surface, and can have a significant impact on the sharpening process.
-
Coarse grits: Coarse grits, typically in the range of 80-220, are best for removing nicks, chips, or dull edges from a knife. They are also useful for restoring chipped edges.
-
Medium grits: Medium grits, typically in the range of 300-800, are best for general sharpening and maintaining the edge of a knife. They can be used to refine the edge after using a coarse grit, or to sharpen a knife that is only slightly dull.
-
Fine grits: Fine grits, typically in the range of 1000-8000, are best for honing and polishing the edge of a knife. They can be used to create a razor-sharp edge, or to maintain a fine edge on a knife that is already in good condition.
When selecting a sharpening stone, it's important to consider the grit of the stone and the type of knife you have. For example, a coarse grit may be appropriate for restoring a damaged edge, while a fine grit may be best for honing and polishing a knife that is already in good condition.
In general, it's a good idea to start with a coarse grit and progress to finer grits as you refine the edge of your knife. By using different grits, you can create a sharp and durable edge that will last for many uses.
But, keep in mind that by going to rough, you will actually be damaging the knife edge. This can of course be fixed if you start sharpening with finer stones, but you don't want to make more work for yourself.
Knife Sharpening Angle Guide
When it comes to sharpening your knife, the angle at which you hold the blade is crucial to achieving a sharp and durable edge. Here's a guide to help you determine the proper angle for your knife:
-
Single-bevel knives: Single-bevel knives, such as a Japanese Nakiri or Usuba, typically have a sharpening angle of 10 to 20 degrees. It's important to maintain this angle consistently while sharpening to avoid damaging the blade.
-
Double-bevel knives: For double-bevel knives, such as a chef's knife or paring knife, a sharpening angle of 15 to 25 degrees is typical. As with single-bevel knives, it's important to maintain this angle consistently while sharpening.
-
Blade thickness: The thickness of the blade can also affect the proper sharpening angle. Thicker blades may require a slightly steeper angle, while thinner blades may require a shallower angle.
-
Personal preference: Ultimately, the proper sharpening angle will come down to personal preference and the type of cuts you'll be making with your knife. Some people prefer a more acute angle for slicing, while others prefer a steeper angle for chopping. Experiment with different angles to find what works best for you.
When sharpening your knife, it's important to maintain the proper angle consistently to avoid damaging the blade. Use a honing rod or angle guide to help you maintain the proper angle while sharpening.
Taking Care of Your Japanese Knives
When it comes to Japanese knives, there are three main types of materials to choose from: high carbon steel, stainless steel, and ceramic. Each material has its own advantages and disadvantages, so it's important to consider your needs and preferences before making a purchase.
-
High carbon steel: High carbon steel knives are known for their sharpness and durability. They are also easier to sharpen than stainless steel knives, but they are more prone to rust and staining.
-
Stainless steel: Stainless steel knives are a popular choice for their resistance to rust and staining. However, they are typically harder to sharpen than high carbon steel knives and may not hold an edge as well over time.
-
Ceramic: Ceramic knives are known for their sharpness and light weight. They are also rust and stain resistant, but they are much harder than steel and can be brittle. They also require special sharpening tools and techniques.
When choosing a kitchen knife, consider your needs and preferences, such as the type of cooking you'll be doing, the level of maintenance you're willing to undertake, and your budget. Each type of knife has its own benefits and drawbacks, so be sure to choose the one that's right for you.
Taking care of your knives is essential to keeping them sharp and in good condition. Here are some tips to help you get the most out of your blades:
-
Store properly: Store your knives in a safe place, either in a knife block or in a knife sheath, to protect both the blade and those around it.
-
Clean after each use: After each use, wash your knife with warm soapy water and dry thoroughly (particularly for high carbon steel blades). Avoid putting your knife in the dishwasher, as the heat and detergents can cause damage to the blade.
-
Sharpen regularly: Regular sharpening is the key to maintaining a sharp and durable edge on your knife. Use a sharpening stone or honing rod to keep your blades in top condition.
-
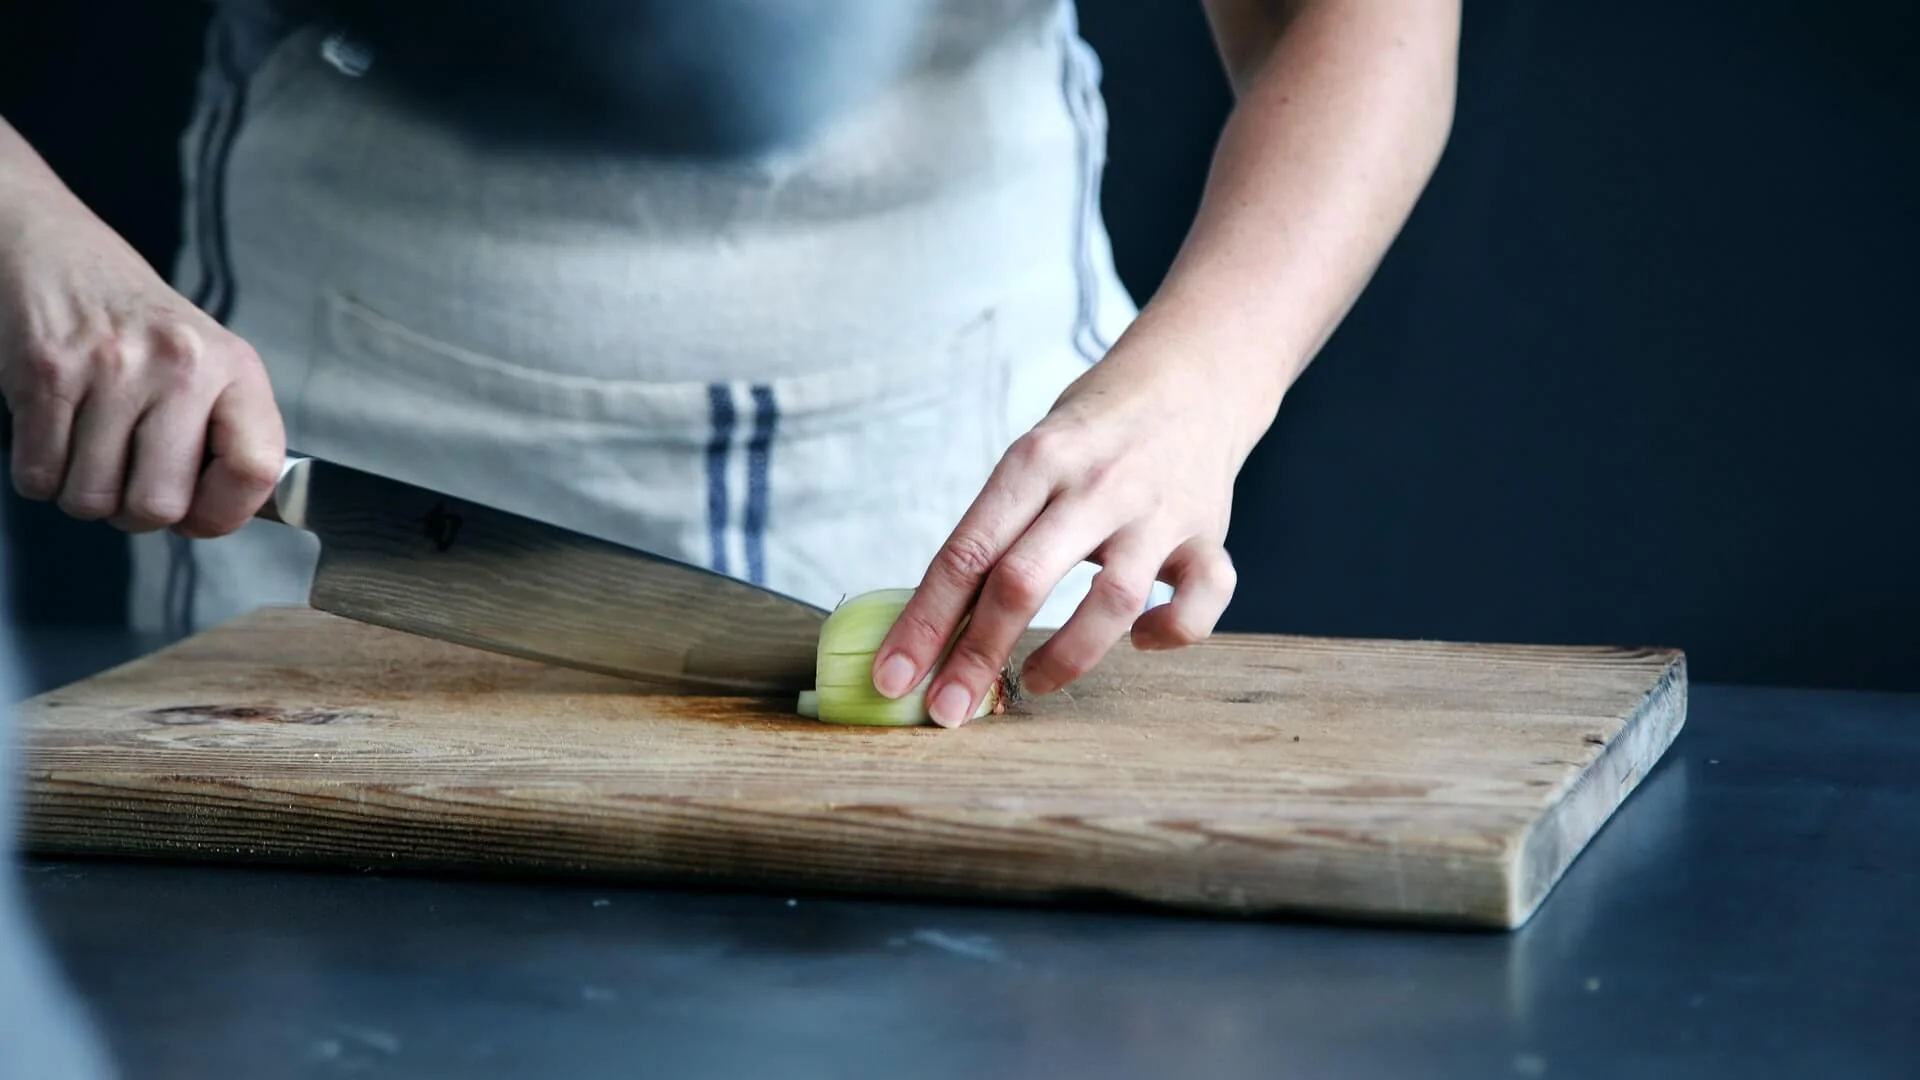
Use a cutting board: To protect your knives and preserve their sharpness, always use a cutting board when chopping, slicing, or dicing. Avoid using hard surfaces, such as countertops or glass, which can dull the blade.
-
Handle with care: Handle your knives with care, using the right grip and avoiding excessive force. This will help to prevent damage to the blade and prolong the life of your knife.
By following these tips and choosing the right type of knife for your needs, you can ensure that your kitchen knives will be in top condition for years to come.
What Is the Difference Between Honing and Sharpening a Knife?
Honing and sharpening a knife are two distinct processes that are often confused. While both are important for maintaining a sharp and durable edge on your knife, they serve different purposes.
-
Honing: Honing is the process of realigning the microscopic "teeth" on the edge of a knife. This helps to straighten out any small bends or deformations in the blade and maintain its overall sharpness. Honing should be done regularly, such as before each use or every few uses, to keep the blade in top condition.
-
Sharpening: Sharpening, on the other hand, is the process of removing metal from the edge of a knife to create a new, sharp edge. Sharpening should be done less frequently than honing, typically every few months or as needed, depending on the frequency of use and the type of knife.
When honing a knife, you'll typically use a honing rod or sharpening steel. When sharpening a knife, you'll use a sharpening stone, electric sharpener, or other sharpening tool.
In summary, honing is the process of maintaining the sharpness of a knife, while sharpening is the process of creating a new, sharp edge. Both processes are important for keeping your kitchen knives in top condition, so be sure to incorporate both into your knife maintenance routine.
How long do sharpening stones last?
Sharpening stones, also known as whetstones, can last for many years with proper care and maintenance. The lifespan of a sharpening stone will depend on several factors, including the type of stone, frequency of use, and storage conditions.
-
Natural stones: Natural stones, such as Japanese water stones, can last for several years with proper care. These stones may need to be flattened over time, as the abrasive particles can become dished out from repeated use.
-
Synthetic stones: Synthetic stones, such as ceramic stones or diamond stones, are typically more durable than natural stones. They may last for many years, even with frequent use, but may eventually need to be replaced if they become damaged or worn down.
-
Factors affecting lifespan: The lifespan of a sharpening stone will also be affected by factors such as storage conditions, exposure to moisture, and frequency of use. Keeping your stone dry and protected from moisture will help to extend its lifespan.
In general, sharpening stones can last for many years with proper care and maintenance. Regular upkeep and proper storage can help to extend the life of your sharpening stone and ensure that it remains effective for sharpening your knives.
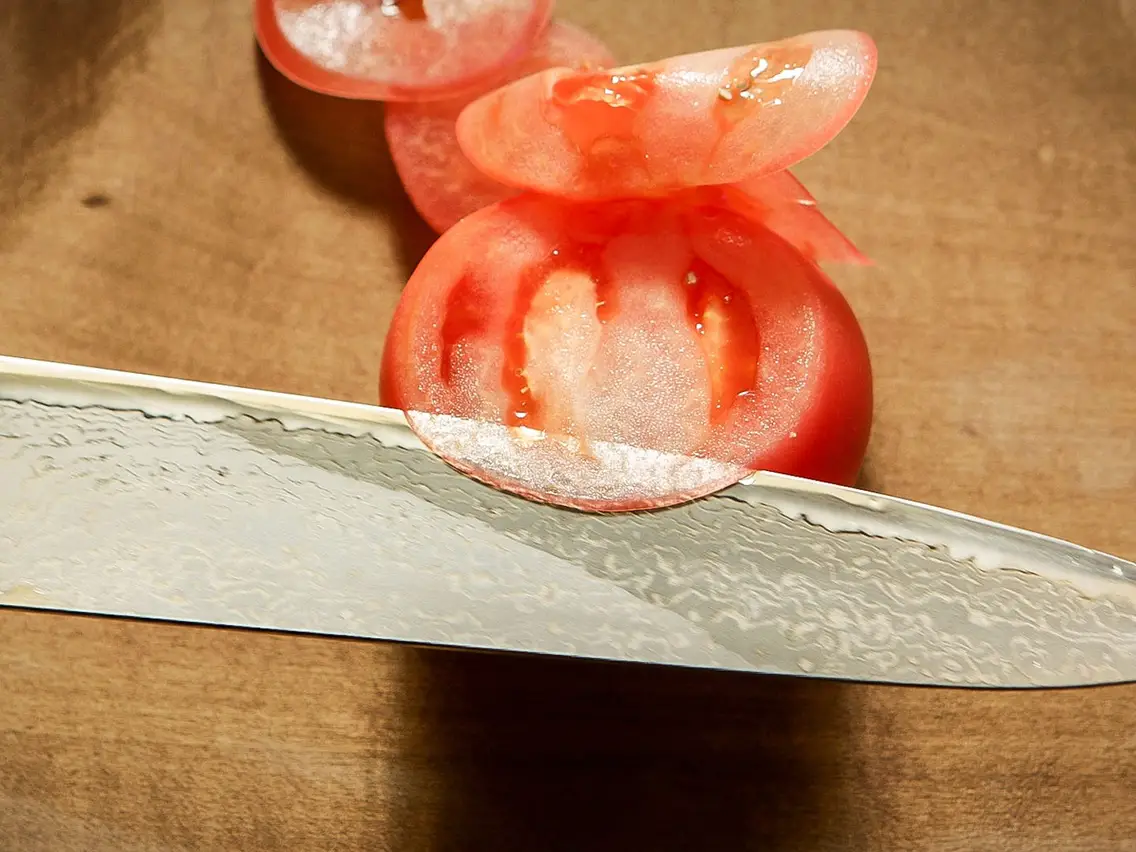
Knife Sharpness Test
A knife sharpness test is an important tool for determining the effectiveness of your sharpening efforts. There are several different tests that you can use to assess the sharpness of your knife, including:
-
The hair test: Hold a piece of hair between your thumb and forefinger and gently touch the blade of your knife to it. If the blade is sharp, it should easily slice through the hair.
-
The paper test: Hold a piece of paper vertically and try to slice through it with your knife. A sharp knife should easily slice through the paper without tearing it.
-
The tomato test: Cut a ripe tomato with your knife. A sharp knife should easily slice through the skin without crushing the flesh of the tomato.
-
The arm hair test: Gently touch the blade of your knife to the hair on your arm. A sharp knife should easily slice through the hair without pulling it.
By regularly testing the sharpness of your knife, you can assess the effectiveness of your sharpening efforts and determine when it's time to sharpen the blade. Regular testing can also help you to identify any issues with your sharpening technique, so you can make adjustments as needed to achieve the best results.
Basic Knife Sharpening Tips
Sharpening your kitchen knives is an essential part of maintaining their sharpness and durability. Here are some basic tips to help you get the most out of your sharpening efforts:
-
Choose the right stone: Choose a sharpening stone that is appropriate for your knife and your skill level. There are many different types of sharpening stones available, including natural stones, synthetic stones, and combination stones. Consider the type of knife you have and your own skill level when selecting a stone.
-
Use a liquid: Regardless of the type of sharpening system you are using, some kind of liquid can help. Not only will it help things move smoothly, but it will help remove the small metal shavings from sharpening which will help you sharpen your knife better and protect your stones. This will help to prevent the stone from becoming damaged or worn down too quickly.
-
Use the right angle: When sharpening your knife, be sure to maintain the correct angle between the blade and the stone. The angle will vary depending on the type of knife you have and your personal preference, but a common angle is around 20-30 degrees.
-
Apply light pressure: When sharpening your knife, apply light pressure to the blade and make sure to sharpen both sides of the blade evenly. Avoid using excessive force, as this can cause damage to the blade.
-
Follow the manufacturer's instructions: If you're using a sharpening tool or system, be sure to follow the manufacturer's instructions carefully to ensure the best results.
By following these basic tips, you can get the most out of your sharpening efforts and keep your kitchen knives in top condition for years to come. Regular sharpening will help to maintain the sharpness and durability of your blades, so be sure to incorporate it into your knife maintenance routine.